Useful Hints for Installing the Legend Oil Filter on a 1963-1967 Triumph 650
The Achilles’ heel of the Classic Triumph twins was the sludge trap. Oil was pumped under pressure through journals in the crankshaft to the 2 hollow crank pins on which the rods are connected. Oil under pressure came out small holes drilled into the hollow crankpins to lubricate the plain rod bearings. This is an excellent system and is similar to that used on modern cars. The problem is centrifugal force in the spinning crankshaft acts like a centrifuge and causes particulate matter that accumulates in the oil from combustion to precipitate inside the hollow crank pin. The hollow chamber in the crank pin is known as the sludge trap for obvious reasons and must be cleaned out periodically - perhaps every 20-30 thousand miles depending on how often you changed your oil. Triumph made that easy with a screw on cap on one end of the crank pin. The only problem is that the crankshaft had to be removed from the motor to do it. That means a complete tear down which also means it seldom got done. If the sludge trap is not cleaned the precipitated mater will eventually fill it up and stop the oil flow. The result is dramatic. One of the rods will seize on the crank pin which will snap it in two. The lower part of the rod still attached to the spinning crankshaft will continue around and break out the front of the crankcase. Basically destroying the engine.
If cars have a similar plain bearing system, how can they go hundreds of thousands of miles without cleaning their sludge traps? The reason is modern cars (and motorcycles) have oil filters that filter out the particulate matter. If you buy a vintage triumph pushrod twin that runs fine, there is always the worry about the sludge trap. However, installing an oil filter will stop the sludge accumulation in its tracks. Over the years oil filters have been installed on triumphs but they never looked right. Now Legend cycles has come up with a slick oil filter kit that can be hidden on the 500 or 650 cc unit model Triumphs (1963 to 1970). On the 1968 to 1970 models they hide the filter under the left-side battery cover which can be quickly removed to change the filter. The filter can be easily mounted there because it very accessible. On the earlier models the ignition switch and light switch were mounted on that panel and it was not removable. So for those models they chose to mount the filter on a tubular frame member that protrudes a few inches below the swing arm behind the motor. There is plenty of room there but is not an easy place to get to.
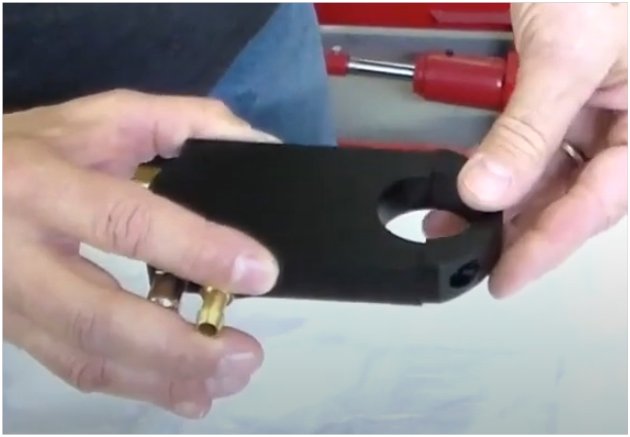
The picture below shows Legend's filter assembly. The aluminum filter platform is held onto the frame tube by the end-clamp on the right. You tighten it with 2 bolts that go through the holes in the end-clamp. The bolts have a hex socket head so you must tighten them with a 3/16” Allan wrench. Those have to be inserted and tightened in a very tight space. Legend has a step by step video on how to install it on YouTube https://www.youtube.com/watch?v=BzIOtjavZyw . In the video the mechanic simply sticks his arm up under the bike with the filter assembly and the scene quickly cuts to him admiring his work. I promise you it is not that easy. I know because I tried it!
There is only 2" between the back of the motor and the end clamp and you can hardly see in that space. You have to get the cap in place and the screws started and tightened in that narrow slot. Once that is done you have to attach the oil lines to the two fittings that are visible at the left end of the platform. While installing mine on my 1966 Bonneville I found a lot of things that didn’t work and a few that did. Here are some tips that should make your task easier.
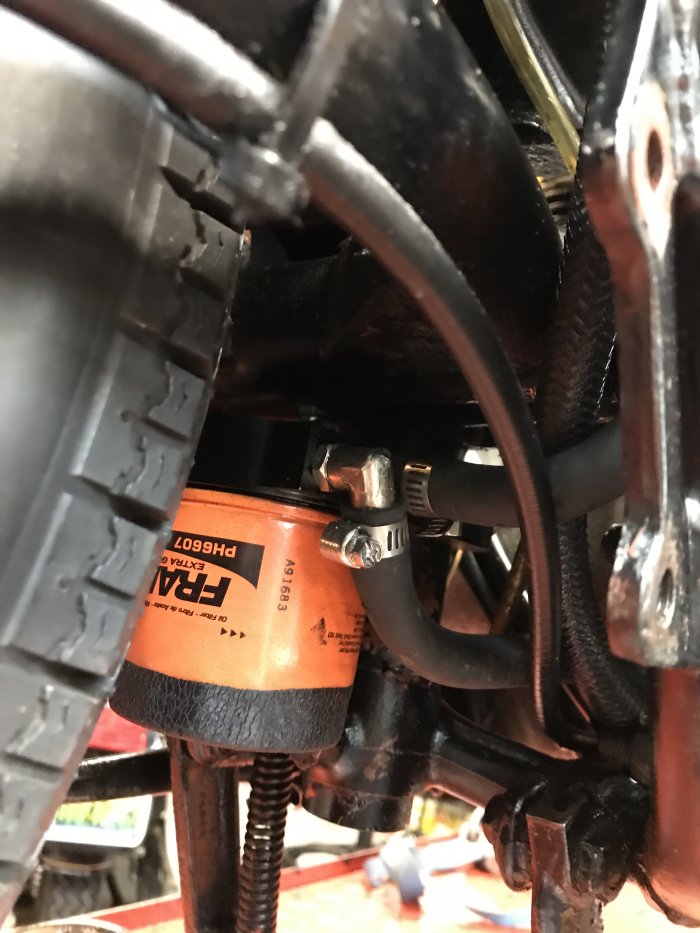
First, you must have a lift to make the installation. If you don’t have a lift find someone who does. Next, you can help see what you are doing by removing the right muffler and its mounting bracket. With the muffler removed you get a pretty good view of the area (See the the last picture below). If your Triumph has twin carbs, remove the air filters so you can look down behind the motor. Amazingly they do not remove anything in the Legend instruction video.
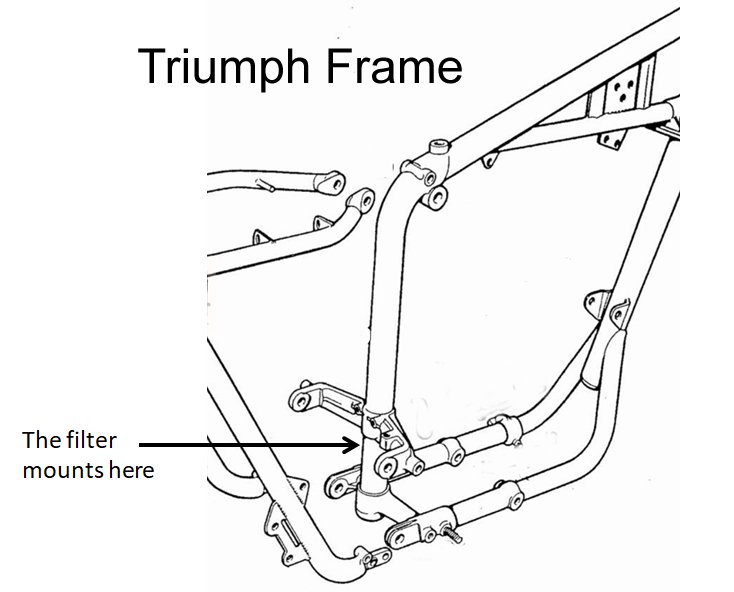
Next let's look at where exactly the filter will attached. The picture below shows a bare Triumph twin frame. Note the backbone protrudes below the swing arm mount. The filter will be attached there.
Next, you need the proper tool to turn the two bolts that hold the end-cap in place. In the video he has
shows a simple L-shaped 3/16" Allan
wrench with a ball-end. That absolutely will not work! Not enough room for the long end with the ball and using the short end It is impossible to get an Allan wrench on the bolts and turn them enough to
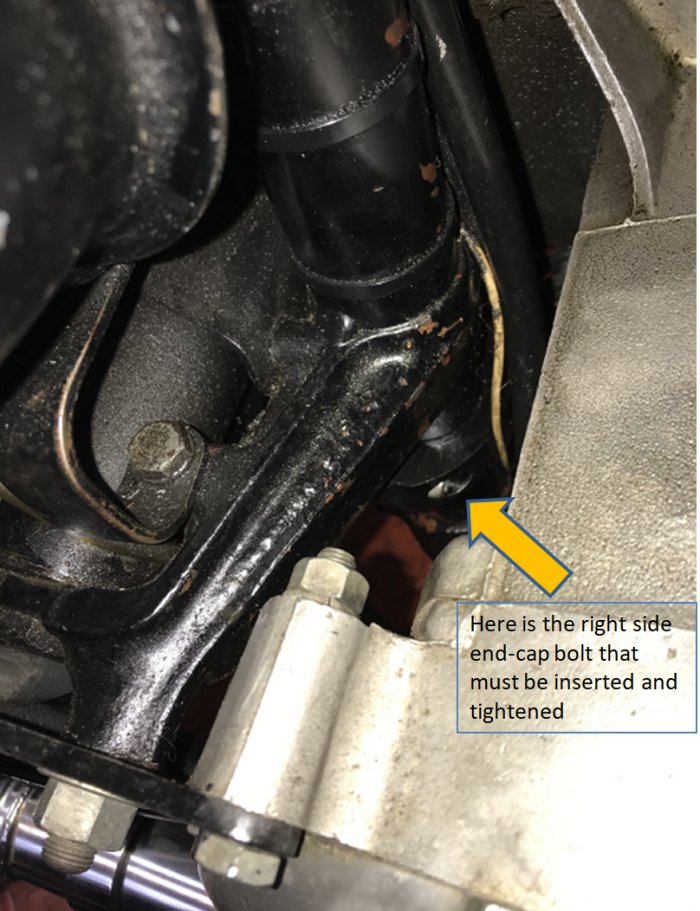
even start the threads. The picture below shows a view of the end cap and how
little room their is to maneuver in there.
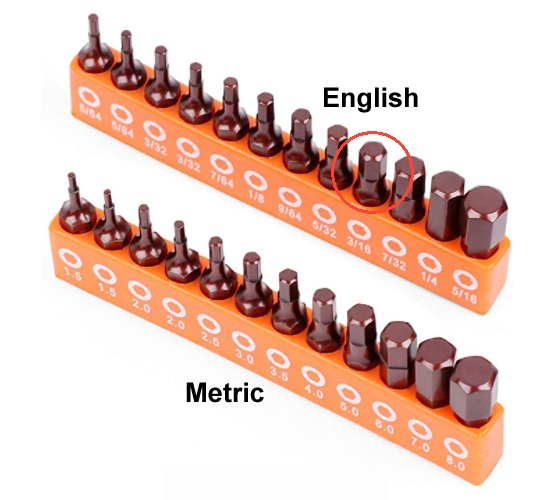
I found the Mulwark 1/4'” hex drive ratchet on Amazon for under $15 and it works very well. Unfortunately, the kit only comes with metric hex bits but I had some English ones that came with a ¼” hex drive screw driver set.
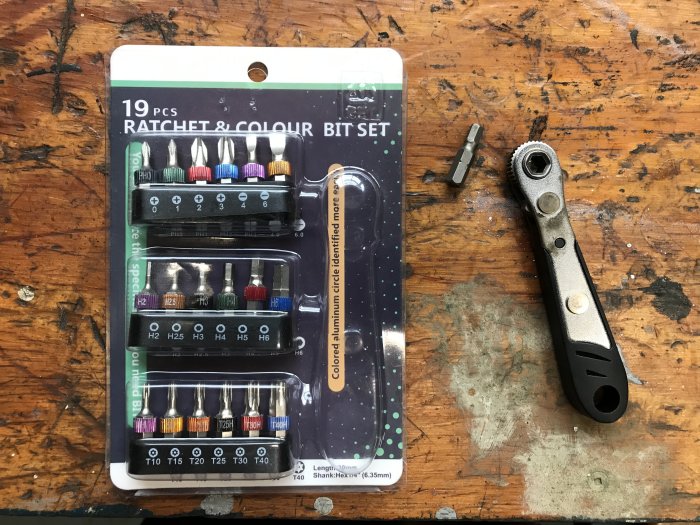
If you don’t have a short 3/16” bit in your tool collection, Amazon sells the Amartisan 24-Piece Hex Head Allen Wrench Set with both Metric and SAE ¼” Hex Bits that are only 1" Long for $10 which includes the 3/16” bit. The picture shows the ratchet with the 3/16” hex bit. I was able to get that tool on the filter mounting bolts with room to spare. See picture below.
Lets do the install:
In the Legend video they start with having you swap out the straight grease zerk on the bottom of the swing arm with a right angle one to allow access with the filter in place. After intalling the zerk, have an assistant hold the filter platform in its place under the bike. Insert the right side bolt into the end cap, insert the ratchet into the bolt head and lower the whole assembly from the top down and try to line it up with the platform and start the bolt. Once started and lightly snugged try to get the left side bolt in. Hint: before you tighten it down, the platform can be rotated and moved up and down. That allows you to find a position that gives you a little more room to start the bolt. Just be sure to have the platform straight and at the proper height before tightening it down. The filter platform should be raised until there is just enough room to get a grease gun on the new zerk. Then tighten it down.
The rubber oil lines connect to two metal pipes that can be seen on the bottom of the motor. look where the pipes enter the motor. The Front one is the Feed and the Rear one is the Return. This F and R bit makes it easy to identify which line is which. Discard the old rubber return line that ran from the motor to the oil tank. Use the 2 new rubber oil lines included in the kit. With the muffler removed it is easy to connect the oil lines as shown below. The right angle fitting gets the return line from the motor and the straight fitting gets the line that goes up to the oil tank. The new lines will need to be carefully cut to the proper length. Make sure that there are no kinks in the oil lines and that they do not touch the exhaust pipe. Fill the filter by pouring oil into it and then screw it on. Start the motor and let it idle with the oil tank's cap off. You should see oil returning to the tank within two minutes. If no oil return, stop the motor and identify the problem.
Return to the restoration page.