It's Twins!
Fall 2021: A friend of mine was telling me over a dinner about his friend in Texas who had a couple of Moto Guzzis that he was trying to find a home for. The story goes like this: The fellow had been riding a 1979 1000SP for several years when he decided to customize it in 1983. He disassembled it and had the frame painted red. When they were reassembling it they noticed that the red paint was already flaking off. The painter had apparently painted over the rust. He was devastated by the mess and parked the red-frame bike, not quite completed, in the back of his workshop. Seventeen years passed by and retirement came. Now that he had some free time he went to a Guzzi dealer to see if he could find somebody to restore his red Guzzi back to its original glory. As luck would have it the dealer happened to have a nice used 1979 1000sp for sale for half the price of a restoration. So he bought that one and rode it while the red-frame stayed in the back of the shop. About 4 years ago he stopped riding due to medical issues. So now two 1979 1000SPs were sitting idle side by side in his shop. My friend had worked with this fellow on the oil rigs in the 80s. They, by chance, met up recently at the Springfield mile and that was when they talked about the Guzzis. He sent a picture of them to my friend and said he could have them for a very attractive price if he wanted to come get them. My friend, a Goldwing and BMW rider, was unfamiliar with the brand and showed me the picture and asked me what I thought. Over the years I had owned several and loved them. I said for that price you should get them and if you do I will be glad to help you get at least one of them running.
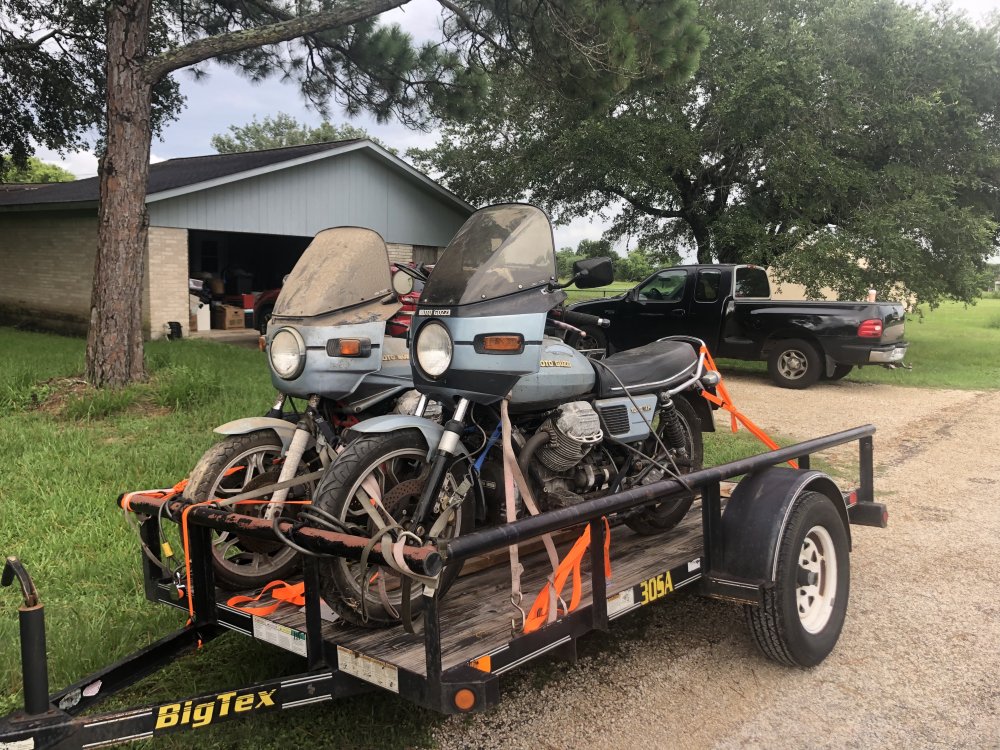
The next week he was off to Texas pulling a
trailer.
Back in Mobile we rolled the bikes into my shop. We worked on the last-ridden bike first. It had decent paint on it and after putting a battery in it we found that all the electricals were working. The bike had some nice mods on it including a pair of quad piston brake calipers up front, pneumatic forks, high-end adjustable rear shocks, and electronic ignition. It also had the LAPD side stand as used on the police bikes. That is a great improvement over the worthless stock side stand. The Guzzi mufflers had been replaced with conical Emgo megaphones. We had to rebuild the rear master cylinder, adjust the valves, and clean the carbs. The tires had some tread left and held air. It had clean oil in the motor. The gas tank was also very clean inside so we put a little gas in the tank and it started right up. A short test ride revealed a solid transmission and drive train. The only issue was a grabby clutch and a charging warning light. The 1000sp uses the same Bosch alternator as in my airhead BMW’s. A quick test revealed open windings on the alternator’s rotor. I had a spare rotor so we soon had a functional charging system. After a few days of clean up and detailing it went on its way to my friend’s house where it has been ridden for hundreds of miles at the time of this writing.
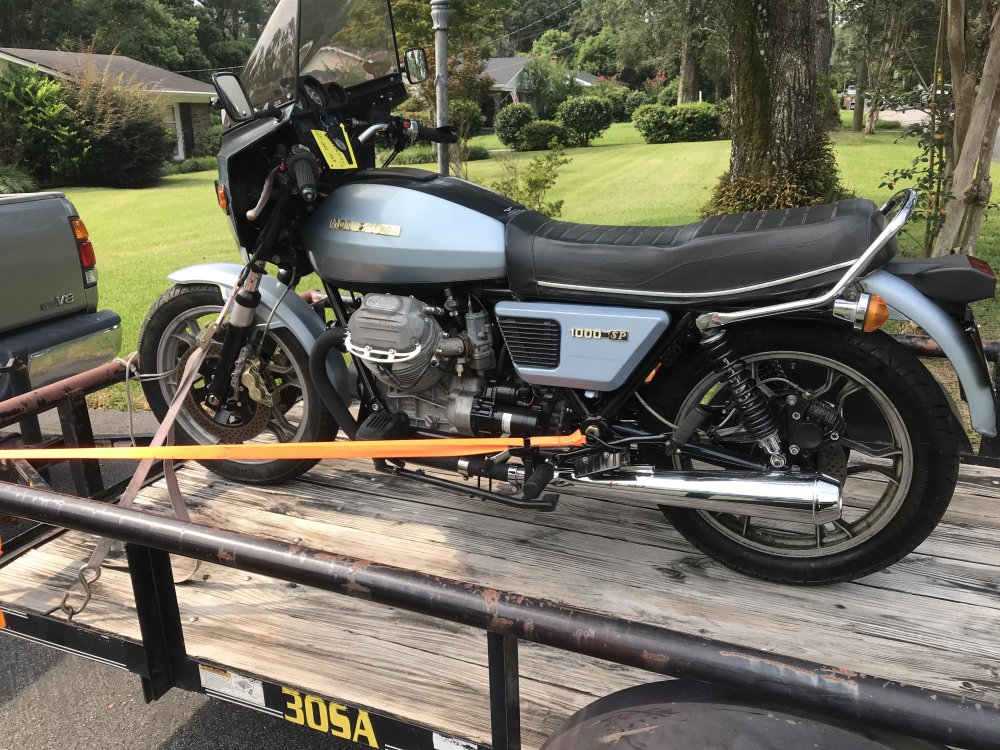
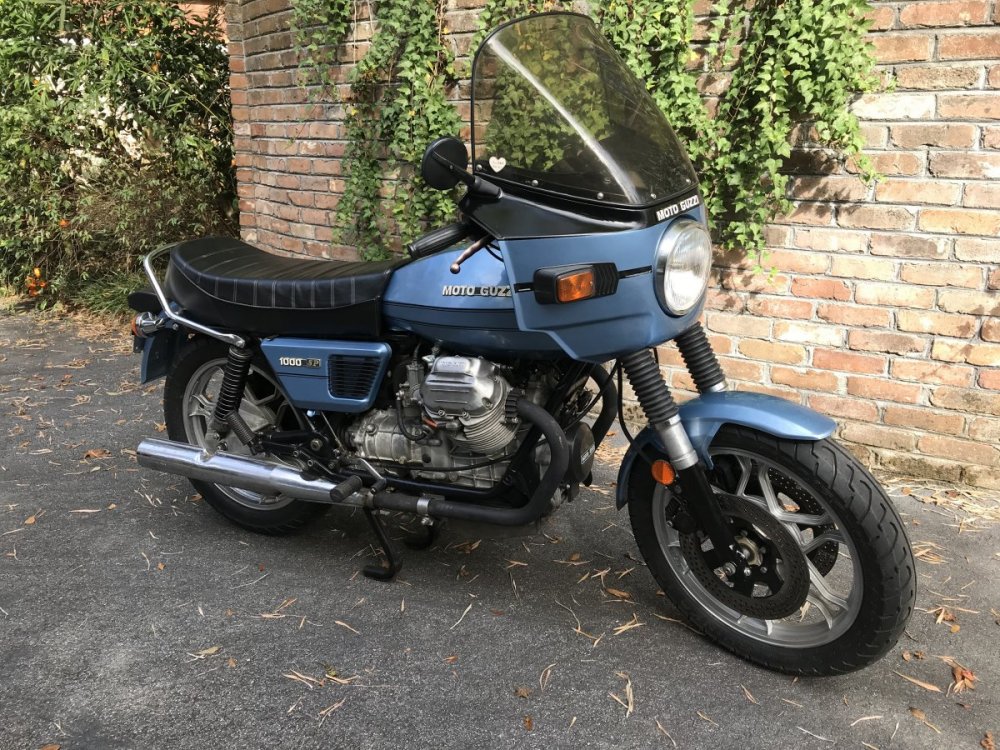
On the way home. This view allows you to see the fancy front calipers, the LAPD side stand, and the Emgo megapones.
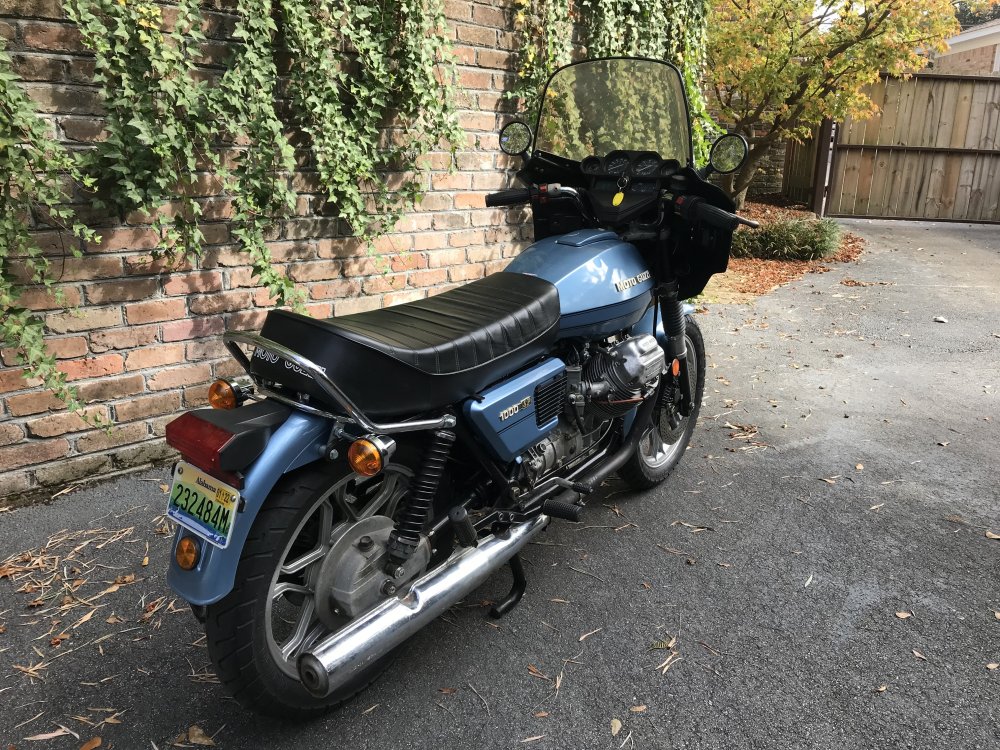
Here is my friend's bike at the time of this writing. Note the painted rims with new tires and Krauser bags
That left the red monster. I negotiated a fair deal with my friend and it became mine. Where do I start? I decided to remove the fairing, tank and side covers so I could tend to the stuck engine first.
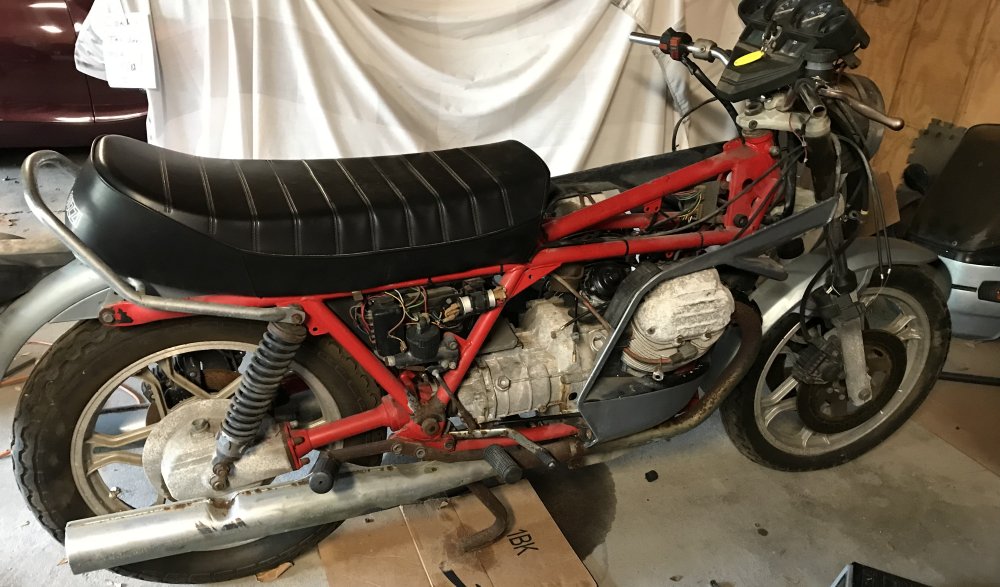
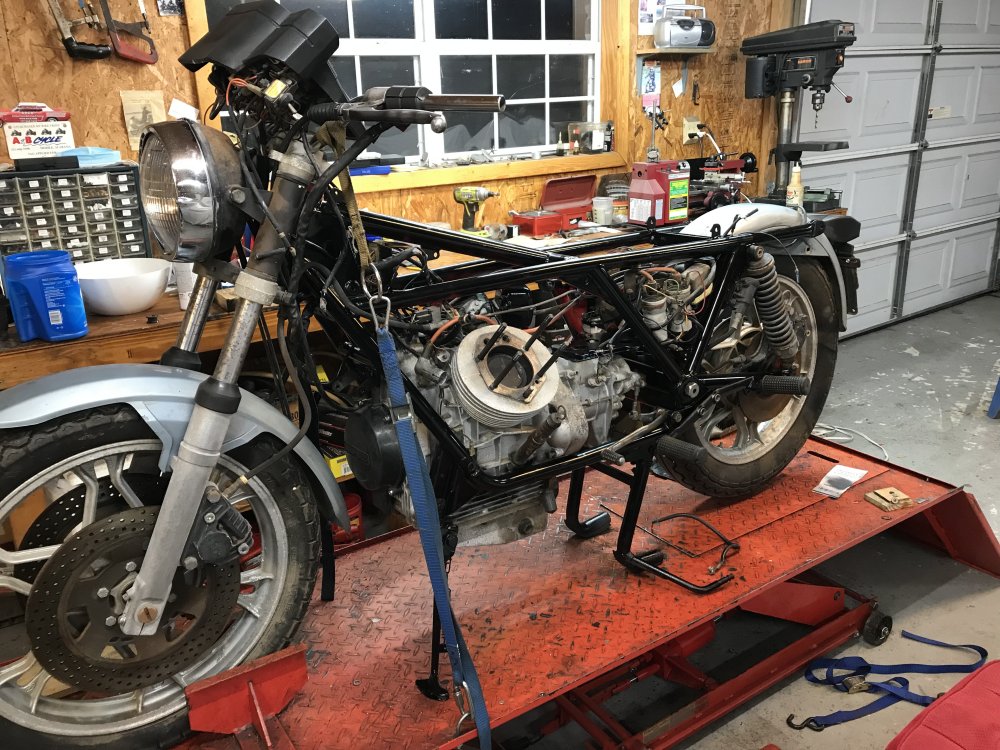
This picture shows the naked red-frame bike (except for the side panels which haven't been removed yet). Lots of corrosion on the motor and transmission. Note the peeling red paint at the swing arm mount. Nasty!
The alternator cover was off and apparently had been off for some time as there was lots of grime and some rust on the alternator parts. But they looked like they would clean up and still work. The bike had been in gear and we pushed it around by pulling in the clutch. Since neither brake worked we could stop it by simply letting out the clutch as the engine was locked. Now on level ground I put it in neutral. I pulled the spark plugs out and they were clean with no rust, a good sign. Next I sprayed some WD40 into each cylinder. There is a plastic plug on the transmission’s bell housing (black spot in the picture above). when I remove it I could see the marks on the flywheel for timing the ignition. The teeth for the starter gear were also visible. My friend said "let me see if I can move the flywheel by prying the teeth up with a screwdriver". Amazingly the flywheel moved easily! I took a wrench to the alternator bolt on the end of the crankshaft. The motor turned over smoothly. The scenario became clear, the previous owner had taken the alternator cover off to periodically see if the engine was free. The bike must have been on the center stand as the side stand had been removed. If a wrench on the alternator bolt could turn the crankshaft then all was well. The bike happened to be in gear but that was no problem as the elevated rear wheel would just rotate as the crank shaft turned. But when rear brakes locked up with rust he could no longer rotate the crankshaft and assumed wrongly that the motor had become frozen, a common problem in piston engines that sit idle for long periods. Suddenly it looked like I might actually have a runner.
I took the heads off to double check that everything was ok. Some of the early Moto Guzzis had aluminum cylinders with chrome-plated bores. When the chrome failed (and eventually it would) the only recourse was to replace the cylinders. Fortunately the 1000SPs had iron bores that last longer and can be rebored oversize if needed. The bores in my bike looked great with no rust. I lapped the valves and reassembled the head. The oil feed lines to the top-end were rotten and I replaced all oil and air hoses.
I got the red out! Side covers are gone and I can work on the motor. The top end looked great.
Unfortunately the distributor cap had also
been left off and the points along with the points cam were rusty. A rusty
points
cam will quickly wear the phenolic pads on the points so they will soon lose
their gap. I removed the
points and used fine emory cloth to take the surface rust off the hardened points cam.
It polished up fine and felt smooth. I looked for replacement points
on-line and saw that a set was $65 plus shipping. I took the old points to my
blast cabinet and after a few short blasts with fine glass beads they looked
like new, even the contact surfaces were smooth with no pits. I put a little
grease on the points cam and set the points at 14 thousandths of an inch. I
found the distributor cover along with the alternator cover in a box of parts
that came with the bike and put them on. Amazingly
there was no rust in the tank so I rinsed it out with some gas and put some new
petcocks in it that I had ordered from MG Cycle. Despite the age of this bike the
parts supply for it is excellent. Both mgcycle.com and harpermoto.com have just about
everything at attractive prices. Especially those little nigy nagy items like
the rubber parts.
Next came the electricals. I had replaced
the very rusty handlebars with a new pair that was in the parts box early on.
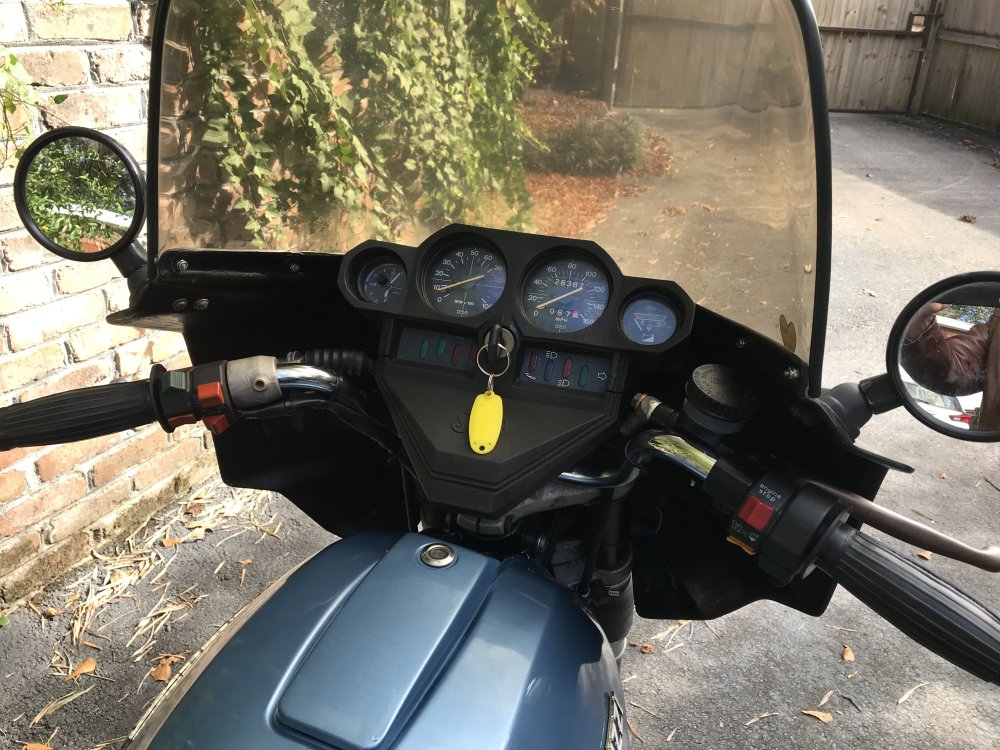
With the fairing off I had good access to the back of the dashboard.
The clutch and throttle cables all worked. I put a brand new garden tractor
battery in it. They fit perfectly
and cost half as much as the real deal. Most of the electricals worked except
the starter. I traced that to a broken wire to the starter switch in the right
side handgrip which I fixed. With the tank mounted and the gas lines connected
she started right up. It sounded great and no smoke. All good except, like the
other bike, the charge
light was on.
Electrical brushes running on two brass rings bring current to the rotor to magnetize it. The rings were dirty but cleaning them did not help. Everything else checked out on the alternator. A large diode board is used to convert the AC current from the alternator to DC. In the BMW airheads it is located above the alternator on the front of the engine. The Guzzi designers chose to put the diode board under the right side panel. I dug it out and, as you can see in the picture below, the copper tracks on the circuit board had literally corroded away. I had a good diode board in my spares and soon I had a functioning alternator.
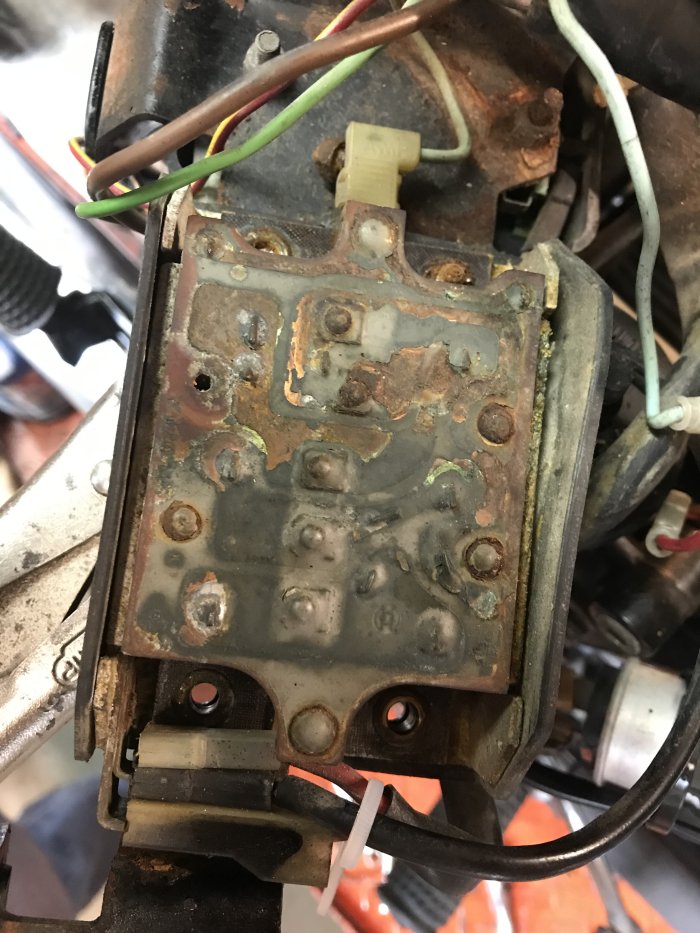
This very corroded diode board had to be replaced.
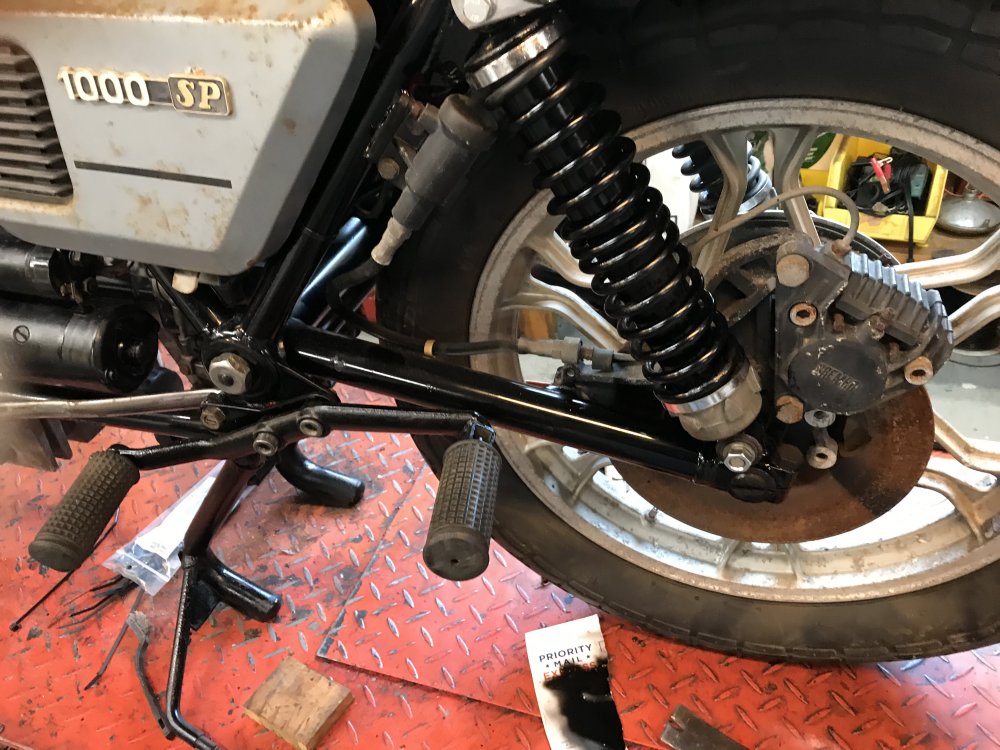
The rear shocks have been restored. The rear caliper was really bad and I simply replaced it. Notice how bad the paint on the side cover was with rust showing through. The wheels were also nasty. The brake regulator/junction box can be seen between the shock absorber and the side cover.
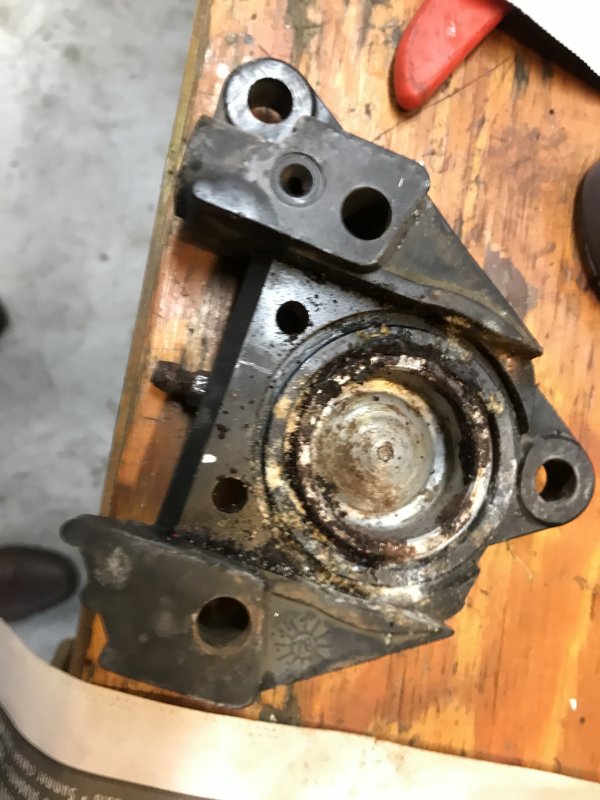
A very nasty caliper, but easy to clean in the parts washer.
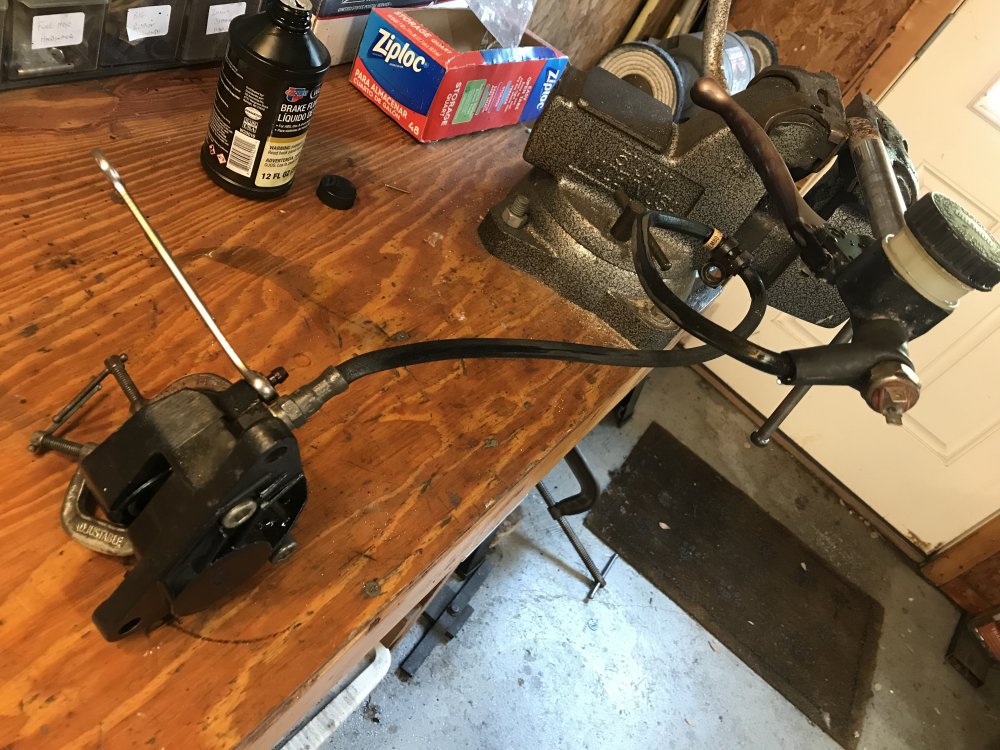
This is how I get the pistons out of the
calipers. The C clamps holds one caliper tight so only the unclamped one
can move. The handlebar master cylinder held in the vise does the pushing. Notice
the wrench on the bleed valve which is needed to let any air out of the brake
line.
After the piston is moved part way out swap the c clamps and push the other
piston out. Do not push a piston completly out until the other one has been
partially pushed out. Once out, you will not be able to push the other one with
hydraulic pressure. Be ready to add brake fluid as the pistons move out.
My bike had factory Krauser saddle bags mounted on it which my friend had asked to keep for his bike. No problem except the rear turn signals were located on the saddle bag rack leaving mine with none. The stock rear turn signals were Lucas lamps as used on the old oil-in-the-frame Triumphs. I found a pair of new Emgo replicas including the chrome stems on eBay for $20. Problem solved. The tires held air and the bike rode fine with plenty of power. Once it was running I concentrated on cleaning it up. I removed the headlight and cleaned its rusty shell in the blast cabinet. I painted it black along with the headlight ears. It needed a new headlight rim gasket which I found at “Euro Trash”. I also put an LED headlight bulb in it. After all of that I put a couple hundred test miles on it and decided it was definitely a keeper.
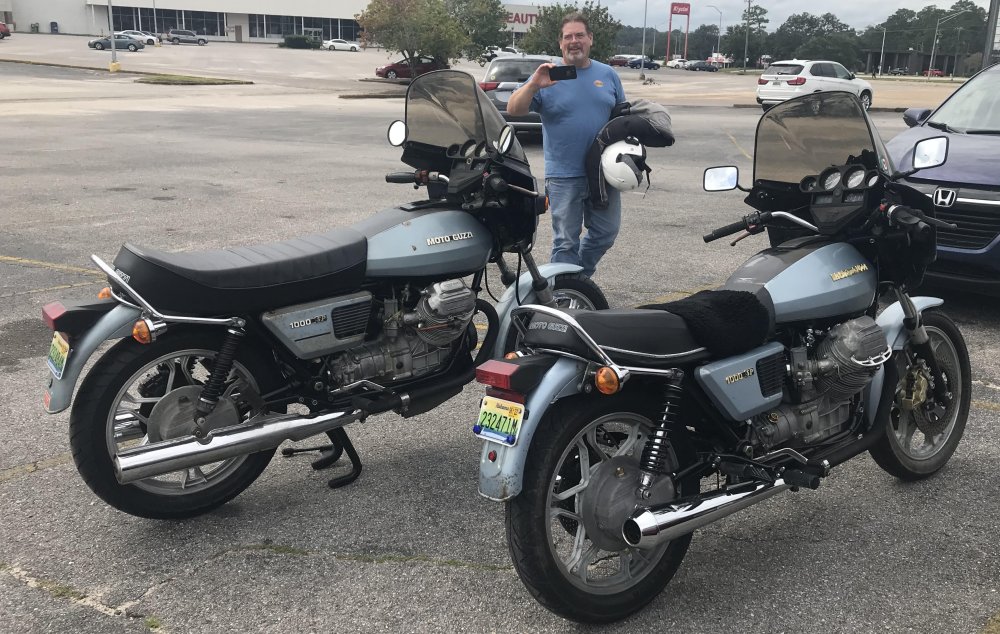
The twins out for test riding. Mine, on the left, has been cleand up but still has its original paint.
To help start the motor the bike has a lever that opens an enrichening valve on each carb. The motor lights right off with them up but unfortunately runs too rich to keep running so I would have to quickly drop them to keep the engine running then it would be too lean so I would have to lift them again for a few seconds and so on. The carbs had the stock #80 enrichening jets in them. I replaced them with #65 jets and now the cold motor will start and idle with the valves lifted until it warms up enough to drop them.
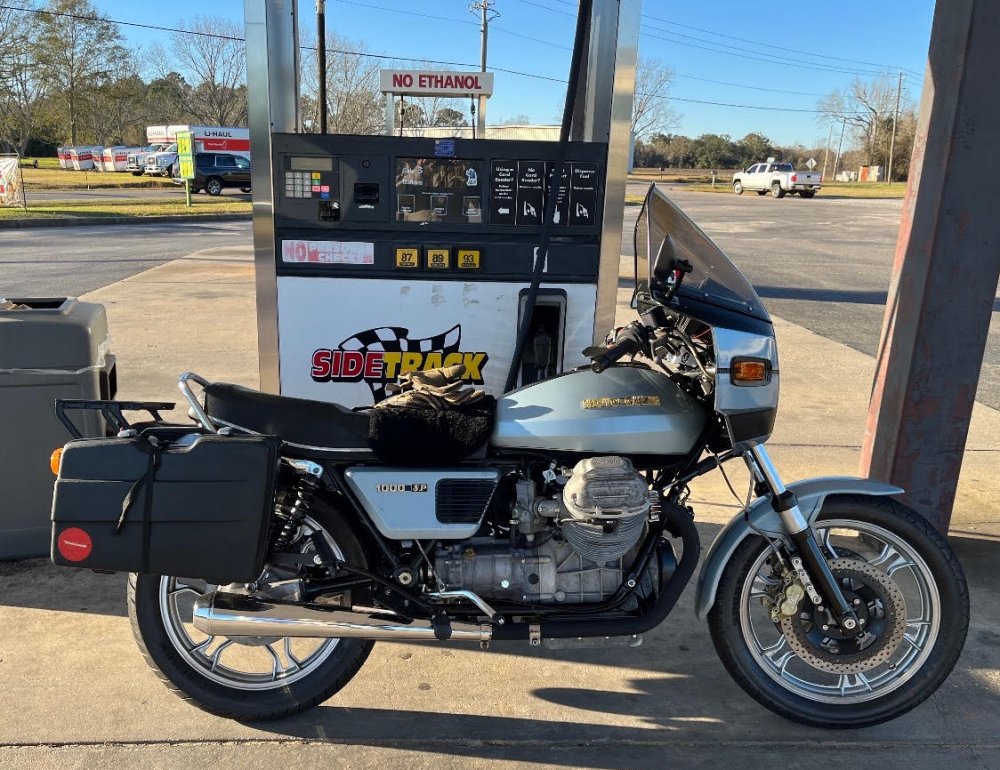
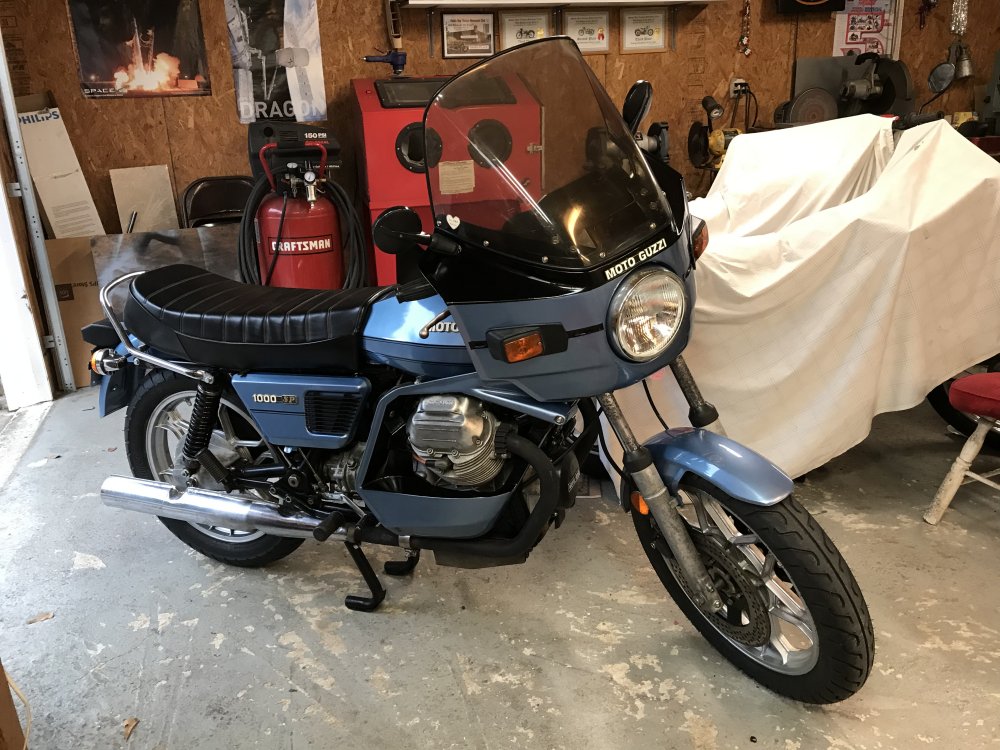
In the above picture my bike still has the shabby original paint on it. For phase two I took the wheels apart, blasted and painted the brake disks as per factory with black centers. I stripped and painted the mag wheels metallic silver and put new Shinko tires on front and rear. Now it was time to paint the sheet metal. The tank, side covers and rear fender were sent to Phil Ostercamp in Grand Bay AL for media blasting down to bare metal and then primed with epoxy primer. The front fender was plastic and just needed wet sanding and priming with a plastic friendly primer. The biggest challenge was the fairing. It was made out of fiberglass and had some Bondo and chicken wire in some places from a past crash. I cleaned it up with lots of sanding and Bondo. I also prepped the fiberglass side panels for painting. I found a good metallic light blue base coat and that was followed by 3 layers of clear coat. It all came out pretty good. Below is a picture of the bike after the paint. The side panels really give it a classy look.
Although the side panels look great they make the bike almost impossible for me to ride. I have long legs and to get my knees behind the panels I have to sit way back on the seat. To reach the grips I need to crouch like I am riding a racing bike which is not very comfortable. Like most of the 1000SP riders, I removed the side pannels and am now riding the bike naked. The panels went to my attic.
Below is the final result
Return to the Restoration page